


Step 1 - prepare fabric for printing ...
my hand writing is not the best and I prefer to make printed labels. I start by following the instructions on BUBBLEJET to soak and prepare my fabric for inkjet printing. You can skip the next couple of steps if you use purchased printer fabric sheets.

Step 2 ... Press and Starch the fabric
press the fabric so there are no creases in it. If you use spray starch on the reverse side of the fabric only you will get a nice crisp piece of cloth. (I believe the reasoning for starching on the reverse side of the fabric ensures the starch penetrates the fibres better .... but dont hold me to that!)

Step 3 : stick your prepared fabric sheet to Steam a Seam 2
this stuff is fantastic and is great for applique work but I found it works great for making printer paper! I just wish we could buy it in the UK! It has a waxy paper on both sides of a heat reactive sticky sheet that is can be used to permanently stick fabric to fabric or fabric to paper or indeed paper to paper! (and possibly lots of other combinations too!)
Remove one of the waxy protective sheets and hand-press on the prepared fabric - do not iron! The sticky surface is tacky enough to create a temporary bond that will hold while you put it through your printer.
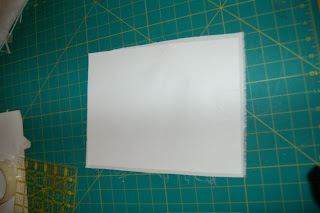

Step 4 : trim the fabric
trim your prepared fabric so it is the same size as the seam a seam sheet .. which is US size letter size. You must make sure there are no loose threads hanging outside the sheet or you can mess up your printer. I always make my fabric bigger than the sticky sheet and trim to size afterwards.

Step 5 : print your label...
using whatever computer program you wish prepare your label wording. (I work with Word and used one of the template label makers with a name badge format.) Usually I name my quilts but since these were going to charity or be house-quilts I decided not to bother. I put my name, where I live and the date I finished the quilt ... I also added my website should anyone want to contact me about the quilt. I also chose to colour my label to suit the backing fabric so it would blend it somewhat. I am not a lover of in-you-face labels unless I am sending them off to exhibition in which case I am all in favour of big writing, big labels.

Step 6 : trim the label to size leaving at least half inch border

Step 7: using iron-on interfacing stitch all around label
using a lightweight iron-on interfacing place the rough side of the interfacing to the right side of the label and stitch around all four sides. Tip ... dont start in a corner .. it may pull down inside your machine and get tangled and then you will get upset! Start half way along a side. Also when you get to the corners sew 2 or 3 stitches at 45 degrees. This will produce a nicer looking corner.


Step 8 : trim around label.
trim to 1/8" inch around the label and make a small slit in the middle of the interfacing.


Step 9 : turn the label right side out.
carefully push the label right-side out and using a blunt end bodkin or other device push out the corners. If you have sewn a 45 degree corner the corners will round off nicely. using your fingers smooth out the edges and very lightly press the extreme edges to flatten. (Don't iron the centre!)


Step 10 : stitch on the label
place the label in the corner of your quilt and sew to backing fabric by hand or be brave and machine stitch in place! I wouldn't recommend a machine sewn edge for an exhibition quilt but for a charity or utility quilt it works really well. It takes next to no time to do and wont come off easily. It takes a bit of courage to do it though if you haven't done this before. 9 times out of 10 you wont even be able to spot the machine stitching on the front of the quilt.


To speed things up on a couple of quilts I missed out the ' bagging' stage of the label alltogther and used the steam a seam to stick the label to the quilt. I did add an extra line of machine stitching around the edges for additional security though. It was a little stiff on the first quilt so on the next one I cut out the centre of the steam a seam and made a 'border' of sticky stuff. This felt much softer and is the way I would recommend in the future.


I have since washed and tumble dried a quilt with the stuck on label and it came out just fine. The edges were all in tact - no fraying at all and it didn't lift off the quilt either. The label did loose a bit of colour though compared to the original unwashed label but not enough for the identification data to be lost.


 Quilter Blogs & Store Search
1 comment:
great instructions
Post a Comment